Tuesday, November 26, 2013

How to Make Chocolate Candies- Cream Filled Chocolate Recipe

Ta Da!
It's the moment you've all been waiting for! So many of my friends have been dying to know how to make my chocolates, and most have already attended one of two classes I've taught, but many can't make it when I do. So, I've decided to post the basics of chocolate making.
Cream filled chocolates are one of the easiest. I'll go step by step and provide pictures for you to help you get an idea what it should look like.
If you have any questions, please post a comment and I'll try to respond as quickly as I can.

First, the list of what you'll need . . .
1. Flimsy cutting board that has NEVER been used for cutting. The chocolate will get stuck in the cut marks. (Hide your cutting board somewhere safe, so it's never used with knives.)
2. Chocolate molds of any shape or size. Preferably bite size.
3. Icing spreader that has a bend like the one in the picture below.
4. If you plan to drizzle chocolate (more on that later) then you'll need a sandwich bag.
5. The right kind of Chocolate (see below).
6. A pan
7. A bowl big enough to set on the pan to create a double boiler. (see picture below)

Directions on Melting Chocolate
 
 First, we should talk about chocolate (who wouldn't). The best and easiest chocolate to work with is Guittard A'Peels. There's variations of flavors, such as milk, dark, vanilla (in red and white), mint (in green and white), lemon (yellow), and orange (colored orange for obvious reasons). I usually use the milk chocolate A'Peels and the vanilla. I'm not a big dark chocolate fan, so I don't make any with it. 
Make sure you buy the A'Peels, for there are different kinds that look the same. A'Peels are easier to melt and I personally think they taste the best. If you live in the Salt Lake City area, then the best place to buy them is at Gygi's.
You can also find small paper candy cups of different colors and sizes at Gygi's, plus tons of other kitchen supplies.
To begin. Fill pan with enough water without allowing the water to touch the bowl that will sit inside. Be sure to keep the inside of the bowl free of water. Water and chocolate doesn't mix well. :)
On a low temperature set pan of water over low heat with the clean dry bowl over the top. It takes a few minute until the bowl begins to warm. At that point add the chocolate. Be patient. This takes a few more minutes to melt. You don't want to melt too fast or your chocolate will turn white later on. Nice and easy is what you want. While you wait for the melting to begin prepare your fillings. Keep an eye on the chocolate. You don't want the water below the bowl to boil. If it does boil, take the bowl off the pan and let the water relax and return to a no boil state. Be sure to stir every couple minutes, but don't whip and stir too much or you'll put air into the chocolate which could cause it to turn it white.
It's finished when it's all smooth. Take bowl off heat (keep the pan with water on heat) and place on hot pad while you spoon it into molds or whatever you might be using it for.
Keep an eye on your chocolate as you use it. If it gets cooled off and begins to thicken put back on pan for a minute then remove.
Once you're done with whatever you might be making and you've got left over chocolate, don't through it out or feel like you need to lick out the entire bowl. Spoon the remaining chocolate onto a plate in one inch circles and place in fridge. When that's cooled you can add it back into the bag of chocolate and can use it for another day.

Now for the filling . . .

Mix together
1/2 cup softened butter (one cube)
6 cups powdered sugar
3 tablespoons of heavy cream
1 tsp of extract (your choice of flavor)
Mix well until it's as thick as a cookie dough.
The flavors are left to your imagination. When I make lemon I add a tad bit of yellow food coloring so we don't get confused at what we are eating. I love to add chopped candy canes with peppermint extract. I like to add about 4 tablespoons of pistachio instant pudding to the pistachio extract to give it a bit more flavor and color. You can also add coconut with the coconut extract, but I have a completely different recipe for coconut filling that I might share later. My daughter once chopped M&M's and Heath bars and added to this recipe.
Come up with your own flavor and share your experience with me. I'd love to hear what yumminess you've created. (I know, yumminess isn't a word, but I make up words all the time).

Hopefully you've kept an eye on your melting chocolate and stirred every minute or so.
Now that you've got you filling complete and your chocolate is ready, let's proceed.
Fill your molds to the rim (it's okay if it's a little messy at this point). Tap the mold against the counter so the bubbles will detach themselves from the side (you don't want bubbles creating holes in your chocolate).
The next step is tricky. Flip chocolate mold over the top of your cutting board, making sure to keep all the drips falling on the board. You'll need to work fast, as you don't want to let too much chocolate fall out. You are aiming to create a chocolate shell inside your mold, but you don't want the shell to become too thin, but having it too thick will cause you to not have room to add your filling.
Here is a short, somewhat blurry video of me creating a chocolate shell. I had to flip it over twice because not enough chocolate dripped out, so watch the thickness. :)
You want the chocolate to look like this inside the mold . . .
Once you've scraped the extra dripping chocolate off the mold then as fast as lightening put it in the fridge on a flat service. If you don't put it in the fridge right away or if it's not level then you'll get an uneven shell.
Once you've rushed the chocolate to the fridge you'll want to get all that extra chocolate that just dripped out back into the bowl. Using the icing spreader, scrape the chocolate to one end of the cutting board and scrape into bowl.


 Waste not, want not. :)
It takes about 5 minutes for the chocolate shell to cool. You'll want to place your bowl of chocolate on the hot water in between each batch of shells you make, to keep it nice and smooth.
Once your shells are ready, spoon and press filling inside. Be sure to leave enough room for the chocolate that will go on top (or bottom, depending on how you look at it).
Carefully spoon chocolate on top, making sure to keep the chocolate from dripping off the side. Also, don't add to much chocolate. You don't want large pieces of chocolate to hang off the side of your chocolates, and you want them to sit flat and nice.
Place back into fridge right away and wait about ten minutes. Once they're nice and hard you can take them out, flip it over the counter and pop them out of the mold.
If you want to drizzle chocolate over the top, then place plastic baggie with a handful of chocolates. I used lemon flavored A'Peels over my lemon filled chocolates. Heat bag of chocolate in microwave (15 seconds at a time) until smooth. Cut a very small hole at the corner and squeeze and drizzle over chocolates.

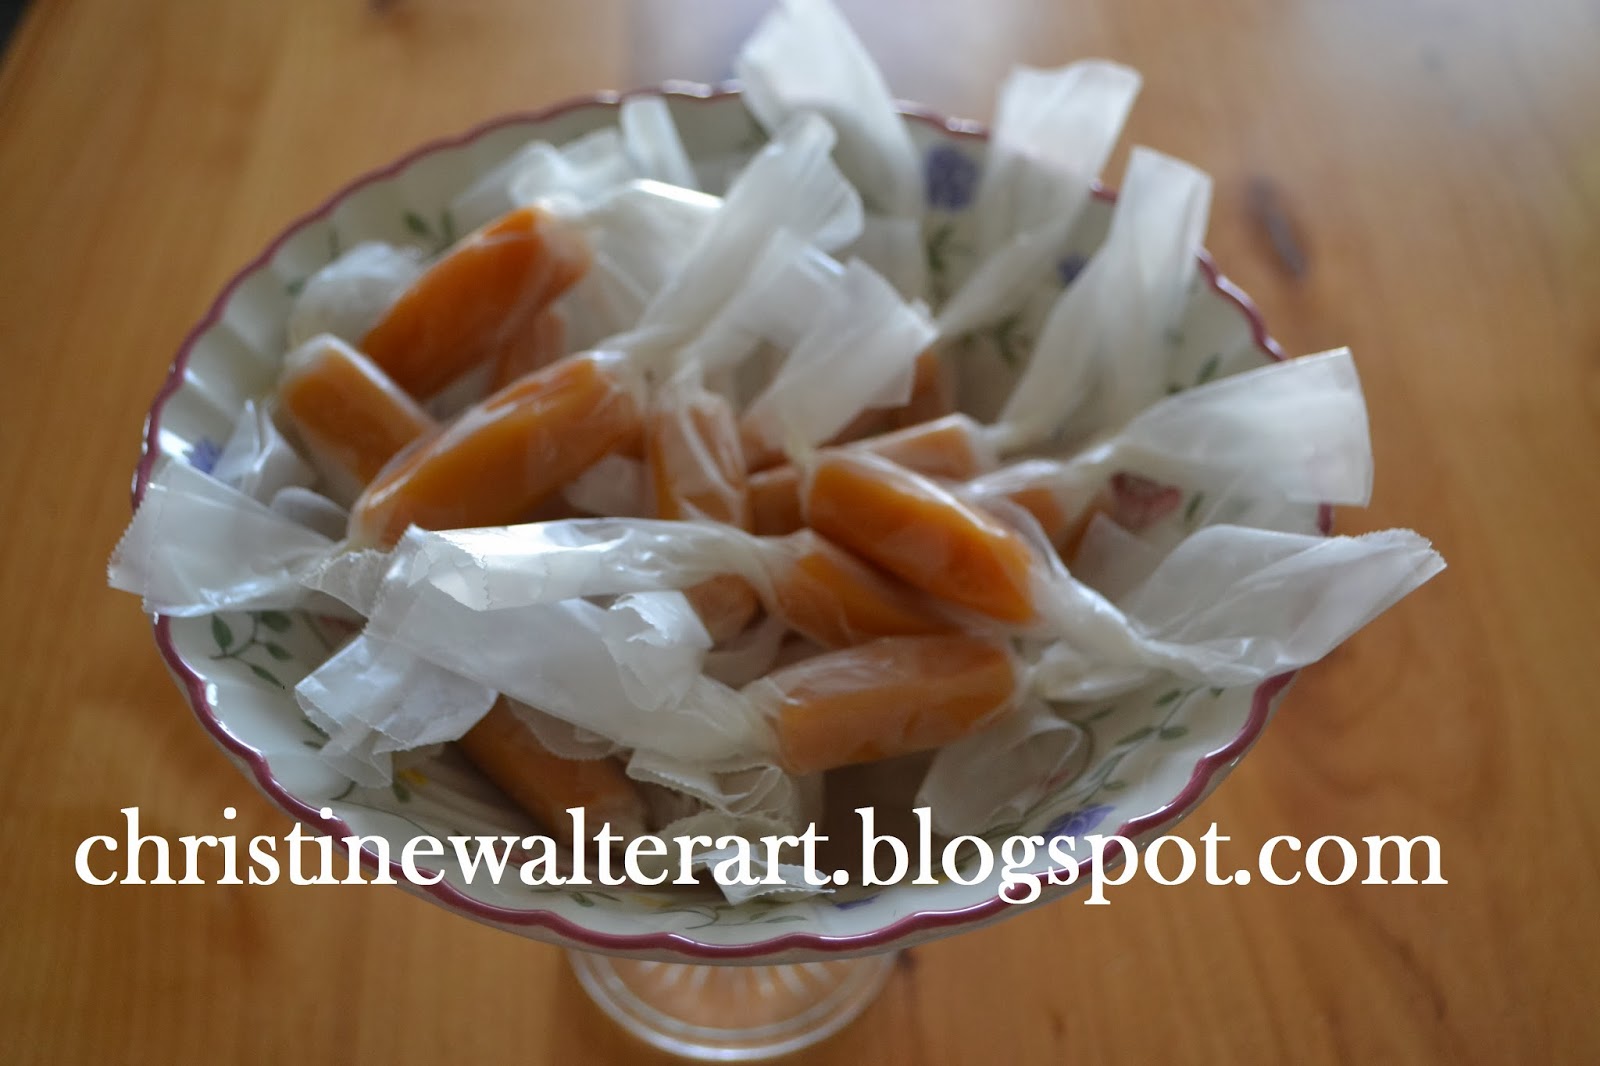
 These chocolates can freeze for months at a time, but honestly, they've never lasted that long. When making goodies for the Christmas season I make several different kinds, freeze them, then when I'm ready to pass them around the neighborhood I box them up and let them sit for a few hours. Frozen chocolates are too difficult to eat and they taste better when room temperature anyway. I usually start this process in November, but no later than the beginning of December.
 Yes, you are looking at the sweet nectar of the Gods. Now get into the kitchen and start making your heavenly creations, then leave a comment and let us all know how it went.


Pin It

Saturday, November 23, 2013

Funny Story

Last night I was reminded of this event and had to share.

A few years back my husband and I braved the crowds at our nearest Costco with our two youngest children. We weaved in and out of the many isles, getting things we didn't necessarily need and rushing to find the one item we came for. We meandered through the long isle of books, reading each title and getting a few to read.

As like every trip to Costco, we ended up with over one hundred dollars more in merchandise. But we got the cheese we came for, so we were good.
We paid for our goods then stood in the line of people shuffling out of the building. My son (he was three at the time) had his arms around his dad's neck while my husband held him tight. In front of us walked a group of teen girls, who gabbed with each other on their way out.
The instant my son caught sight of the huge cranes (my husband had pointed them out once and explained they used them to hook and carry things) they used to build the department store just south of the Costco, my son cried out, "Look Dad, hookers!"

Yep. We couldn't help but laugh and look apologetically to the few girls who'd turned their heads with a disapproving glare.


Pin It

Tuesday, November 19, 2013

Salads and Dressings

Check this out . . .
I know, it looks good doesn't it.
Have you ever wondered what they put in dressings? I go cross-eyed when I read the labels of some foods, wondering the the heck they are adding to something that should be so simple. Food shouldn't be that complicated.
This recipe is so simple and has only 5 ingredients. I usually don't time myself when I make meals, but this dressing really only takes minutes to make and is by far better than any dressing out there. My Grandma came up with this recipe, so all credit goes to her. Thanks Grandma.

Grandma West's Blue Cheese Dressing
3 small containers of crumbled blue cheese
15 oz mayonnaise (Best Foods is best, but don't use Miracle Whip)
1/2 cup buttermilk
garlic powder (Not garlic salt--seriously don't add any salt to this or you'll be overwhelmed)
black pepper

Here's whatcha want to do . . .
Mix your mayo and buttermilk together then add blue cheese. Sprinkle a small amount of garlic powder in at a time, tasting as you go. I can't tell you how much to add, as we all have different tastes. Keep in mind that as the dressing sits the garlic will become stronger. Add a few shakes of black pepper and again, you be the judge on how much you'd like.

See how simple it can be. And don't throw the blue cheese containers away. Use them to store your dressing in. I should warn you, it will disappear fast, especially if you have children who love to dip crackers and bread into it, devouring every drop.

This next one is almost as easy as the first. Take a look-see . . .
This is my version of Taco Salad

The Best Taco Salad
1 pound ground beef (I use lean)
1 can low sodium kidney beans, drained and rinsed
4 tablespoons taco seasoning
1 tomato sliced
1 avocado sliced
1 cucumber sliced
Your choice of shredded cheese
1 head of Green Leaf lettuce (if you use iceberg lettuce I will shake my head at you and wonder if you have taste buds at all)

Brown your beef over medium heat until cooked through. Add kidney beans and seasoning and cook for another minute or two. Assemble your salad how ever you prefer then add meat on top. You can use regular old ranch dressing if you aren't watching what goes into your body, or you can mix a pinch of Italian seasoning and sour cream together and use in place of the ranch.
My family likes to add pieces of chips to the salad to give it more crunch.

Let me know what you think of it. I'd love to hear from you all!

Pin It

Sunday, November 17, 2013

Christine's Peanut Butter Chocolate Chunk Cookies.

As I've said before, there's not much better than peanut butter and chocolate, and putting it together in cookie form makes it even yummier. These particular cookies are my husband's and at least two of my brother's favorite cookies. In fact, when my oldest brother comes to visit and I don't have these cookies made he tells me "You're fired!"
I'm not sure what I'm fired from, but no one likes to be fired.
If you're concerned about calories and would like to cut back, take my advice and do what my Grandpa West does; Dunk the cookies in milk, it drowns the calories. ;)
Christine's Peanut Butter Chocolate Chunk Cookies
3/4 cup butter (one and a half sticks)
1/2 cup sugar
1/2 cup brown sugar
1/2 cup peanut butter (I use chunky)
1 egg
1 tsp vanilla
1 1/4 cup flour
1/2 tsp baking soda
1/2 tsp salt
1/2 tsp cinnamon
Chocolate chips or melting chocolate chopped into chunks. (I use the same chocolate that I use to make chocolate candies (see posts below).)
Cream butter and both sugars together then add egg and vanilla. Mix for 3 to 5 minutes (In electric mixer). In separate small bowl mix flour, soda, salt and cinnamon. Blend flour with butter mixture until well blended, then add chocolate chips or chunks. Spoon onto baking pan (I use a stone, they turn out better that way) and bake at 375 for 10 to 12 minutes.

Tip: Try not to eat them all in one day.

You might be wondering why I would post recipes like this when I'm supposed to be on a no sugar diet. Well, to report, I've been doing great on this diet and I've gotten to the point where I can make goodies for friends and family without that strong desire to eat them as well. I still get satisfaction watching others enjoy my treats and the smell makes my house warm and inviting. It's enough of a reward for me.
So, enjoy!

Pin It

Saturday, November 16, 2013

Minestrone Soup

This is one of those recipes made for a slow cooker and one that will also fill your house with a mouthwatering savory scent. The best time to make this soup is on a rainy day and when you know you'll be busy in the evening and don't want to fuss with cooking and loads of dishes to clean.

Minestrone Soup
1 pre-cut package of stew meat
1 tablespoon of olive oil
2 to 3 cups water
2 cans diced tomatoes (low sodium)
5 cubes beef bouillon
1 can of kidney beans drained and rinsed (or garbanzo beans or both)
Carrots (how ever many you desire)
1 onion diced
2 to 3 tsp diced garlic
A half a head of cabbage chopped
1 zucchini chopped to bite size pieces
1 tsp thyme
1 tsp basil
salt and pepper to taste
Pasta shells

Brown all sides of meat in hot pan over medium high heat. Don't cook all the way through, just lightly brown. Put meat in slow cooker along with everything else, excluding pasta shells. Slow cook all day on low. Once you're ready to eat, cook pasta shells and add to individual bowls. I wouldn't add pasta to entire thing, pasta can get a bit soggy if added to soup and left in the fridge. I like to top soup with parmesan cheese and fresh basil. Pin It

Tuesday, November 12, 2013

Avocado Lime Ranch Dressing

The other day I stopped at a popular fast food restaurant (I don't know if I should name the place, so just in case, I won't) and ordered a chicken wrap. The only choice I had for dressing all came with sugar. Sugar is in almost everything. Grr. I was already on my way home, so I waited until I could figure out what to eat with it without eating their sugar dressings. This is what I came up with.

Avocado Lime Ranch Dressing
1 ripe avocado
1/4 cup sour cream
a few sprinkles of Italian seasoning
Salt to taste (If you want to add more salt)
2 tsp lime juice
Smash avocado in small bowl, add sour cream, seasoning, salt and lime juice. Mix and enjoy on wraps, salads, sandwiches and anything else you can think of.
Who says you can't eat yummy things?

Pin It

Sunday, November 10, 2013

Buttermilk Pancakes with Buttermilk Syrup

This delightful recipe is from my Mom. She taught me when I was young to make homemade pancakes that fall apart when you take your first bite. This might be a staple recipe in your home already, but I can't know for sure so I'm sharing. :)

Buttermilk Syrup
 1 ½ cup sugar
¾ cup buttermilk
½ cup butter
2 tablespoons corn syrup
Bring to boil over medium high heat then take off heat and add in
2 tsp vanilla
Serve over pancakes

Buttermilk Pancakes
2 cups buttermilk
1 egg
Mix together in bowl
1 rounded cup of flour
1 tablespoon baking powder
1 tablespoon sugar
Dash of salt
Mix dry ingredients together then add in with buttermilk.  ONLY STIR FOR 10 SECONDS.  DO NOT OVER STIR.  IT SHOULD BE LUMPY.  Then cook pancakes on pancake grill.
Pancake batter will bubble a bit and that's a good sign of great pancakes.

Pin It

Peanut Butter Cups

Peanut Butter and chocolate. What could be better. Being on a no sugar diet has gotten easier, that is until someone mentions peanut butter and chocolate. I recently taught a chocolate making class where I made some peanut butter cups. I had made sure to eat something before hand, so I wouldn't be tempted to eat them. I did great. Didn't eat a single one and still haven't. Oh, but it did smell heavenly. For those who'd like to make their own peanut butter cups follow directions below. If you have any questions, please leave a comment. If I don't get back to you, then something has gone amiss with blogger. (It's been known to happen, and it seems to be more often on my blog.)

Directions on Melting Chocolate
 
 First, we should talk about chocolate (who wouldn't). The best and easiest chocolate to work with is Guittard A'Peels. There's variations of flavors, such as milk, dark, vanilla (in red and white), mint (in green and white), lemon (yellow), and orange (colored orange for obvious reasons). I usually use the milk chocolate A'Peels and the vanilla. I'm not a big dark chocolate fan, so I don't make any with it. 
Make sure you buy the A'Peels, for there are different kinds that look the same. A'Peels are easier to melt and I personally think they taste the best. If you live in the Salt Lake City area, then the best place to buy them is at Gygi's.
You can also find small paper candy cups of different colors and sizes at Gygi's, plus tons of other kitchen supplies.

Once you've got your chocolate home you'll need to prepare your kitchen supplies.
What you'll need . . .
One mini muffin pan (as seen below).
One glass bowl (as seen below). 
One pot that the bowl can fit inside of and can hold water without the bowl touching the water.
Spoons.
One pastry bag without a tip.

To begin. Fill pan with enough water without allowing the water to touch the bowl that will sit inside. Be sure to keep the inside of the bowl free of water. Water and chocolate doesn't mix well. :)
On a low temperature set pan of water over heat with the clean dry bowl over the top. It takes a few minute until the bowl begins to warm. At that point add the chocolate. Be patient. This takes a few more minutes to melt. You don't want to melt too fast or your chocolate will turn white later on. Nice and easy is what you want. While you wait for the melting to begin prepare your fillings. Keep an eye on the chocolate. You don't want the water below the bowl to boil. If it does boil, take the bowl off the pan and let the water relax and return to a no boil state. Be sure to stir every couple minutes, but don't whip and stir too much or you'll put air into the chocolate which could cause it to turn it white.
It's finished when it's all smooth. Take bowl off heat (keep the pan with water on heat) and place on hot pad while you spoon it into molds or whatever you might be using it for.
Keep an eye on your chocolate as you use it. If it gets cooled of and begins to thicken put back on pan for a minute then remove.
Once you're done with whatever you might be making and you've got left over chocolate, don't through it out or feel like you need to lick out the entire bowl. Spoon the remaining chocolate onto a plate in one inch circles and place in fridge. When that's cooled you can add it back into the bag of chocolate and can use it for another day.

Now for the peanut butter. :)

Mix around one cup all natural peanut butter and enough powdered sugar to make it thick. I don't measure this recipe because it will depend on how thick you like it. I like it really thick, like a thick cookie dough. I've also made this with crushed graham crackers mix with the sugar and peanut butter. Personally I love the strong taste of peanut butter and that's one reason I use all natural peanut butter vs one that has a bunch of junk mixed into it.
Moving on. 
Mix the PB and sugar together then spoon into a pastry bag. Be sure there is no tip on the end of the bag. Place bag into microwave and warm for thirty second. If it's not warm enough to push out of the bag easily then warm for another 15 seconds.
When your peanut butter and chocolate is ready then spoon a small amount (about a teaspoon size) of chocolate into cups.

Squeeze a small amount of peanut butter mix into center of chocolate. The chocolate should push against the sides, making the peanut butter settle into the center. If the peanut butter sticks up, then use finger to press down.

Spoon a small amount of chocolate over the peanut butter then tap the pan. The chocolate will settle and become flat. The chocolate can cool too quickly before you get the peanut butter in the chocolate, so start by making only two rows at a time. Place in fridge as soon as you can to let cool all the way. If you don't get it into the fridge before it cools then it might turn white.

If you've done all the steps correctly then they should look like this . . .
 Beautiful, isn't it. It makes me want to cry they look so good.
Again, if you have any questions, please, oh, pretty please comment, then watch for my reply.
Thanks for stopping by, and I hope to have more recipes on chocolates soon so keep an eye out.

Pin It

Saturday, November 9, 2013

My Dysfunctional Brian

Let me take you back a few decades to when I was young. I looked like every normal kid. I had the eighties hair style and the handmade shorts with bright neon colors made to look like triangles and paint splatters were at war. Oh, and don't forget the jelly shoes that I wore to bed because I loved them far too much to take off. I had brothers, one sister and parents that loved me. I worked and played hard, like I was taught to do. But . . .

There was one thing different.

My brain didn't work right.

I never understood what was wrong with me--still don't for that matter. I don't remember being tested for any specific learning disorder, but I did spend my entire elementary and middle school years sitting with Mrs. Alexander in the resource center.

I grew  up knowing I was stupid. Being told that my whole life, how could I not believe that? I didn't understand why or how things couldn't make sense. I would look at one sentence or even one word for several minutes without understanding what I was looking at. I'd take a test and spend five entire minutes rereading one paragraph, not comprehending the words. It was almost as if they would mix up once inside my head. If I could explain it, I would say it's like the letters and words went into my brain then changed along the way, making it look like dark foreign marks. Reading had always been my least favorite thing to do. Of course I feel differently now, but I remember my tears dripping onto many book pages, wishing I could have been doing anything other than reading at that moment.

By the time I advanced into middle school I had given up on trying. I knew no matter what I did I would barely pass any test. The only subject I loved was art. I did enjoy learning history, but remembering dates, places and names was a nightmare. When I entered college I thought taking a class on Art history could be rewarding and being two of the subject I was most interested in, I could pass . . . right? . . . Wrong. I soon learned memorizing long Greek words was a recipe for failure.

Words are my worst enemy. Not too long ago I was writing one of my stories and I wrote the word 'across'. To my astonishment the wiggly red line showed up below it, claiming it as misspelled. I kid you not, I looked at that word for nearly ten minutes, not understanding what was wrong with it. In my eyes there was nothing wrong and I began wondering if my software had malfunctioned.
It hadn't. It was my brain. I had to walk away from it then when I came back I realized I had switched the r and the c.

I know, I know, you're sick of hearing that tiny violin that's playing My Heart Bleeds For You. I'll stop.

Despite this sob story about my dysfunctional brain, all the self-esteem issues and bad grades over the years, I still write.

It wasn't until I became an adult that I learned I loved stories. Reading was still difficult. It takes me longer and at times I mess up the words, but I found a love for it regardless. Three years ago I began what was to be a short story for my daughter that I would illustrate for her for a Christmas present. It ended up being a 80,000 word novel that I quickly condemned and set aside.
But I started another story, then another until it snowballed into almost ten novels written with many more ideas on the back burner.
I write because I'm driven. I love it. I do it because I truly want to show my children that no matter your setbacks or difficulty, I you can win.
I will be a published author some day. I know that because my Father in Heaven has set a path for me. He's opened doors that I couldn't open on my own. He's guided me to those who have helped me along the way and given me the knowledge that I need to proceed.

There are days when I struggle with writing. Words don't come to me as easily as they do to most writers. There are times when I am given tasks to do and callings to preform and I automatically think I can't do it. I believe that I'm not smart enough or quick witted to pull something so important off.

But I've learned something over the last couple years. I've learned that the only way I can overcome this way of thinking is to try. I might not be the best or the smartest for the job, but I'm going to try.
I'm going to push myself out of my comfort zone and become the woman my Father in Heaven intended me to be. I know I can be a leader. I don't know how I can accomplish something so far beyond anything I thought possible for myself, but I know I am meant to be a writer and a leader.

There are many of you who believe in me and my stories, and to them I say with tear filled eyes, thank you. Forever and ever, thank you.
I will push forward and write on!


Pin It

Saturday, November 2, 2013

Caramel

Notice! Read the whole post before you make!
Little Morsels of Heaven seems the better title for this post. Besides peanut butter cups, I think caramel has to be the best ball of sugar ever. I'm sharing this recipe, hoping that when you try making it on your own it will actually work. Caramels are tricky to make. Different pans and stoves will alter temperature settings and the amount of time you'll cook it. Don't get discouraged if it doesn't turn out the first time you try. If it turns out too soft, then next time try cooking it longer. If it begins to scorch, then be sure to follow all the steps and tips. Don't give up! Try, try again!

Christine's Caramels

1 cup (two cubes) of no salt butter
1 cup light corn syrup
2 cups sugar
1 can sweetened condensed milk

Before you begin be sure to prepare your glass 9x13 pan with cooking spray. (I use canola). Also, make sure you have hot pads handy and a cup of cool water.
Start by melting the butter in a deep pot over medium heat. (I have a glass stove that I set to number six). Add corn syrup, sugar and sweetened condensed milk. Now pull up a chair and grab your favorite book, because you'll be stirring for awhile. You have to stir constantly for close to 45 min. If you have someone (an adult) close by to take turns stirring, it might save your wrists a bit. Be sure to stir over every inch of the bottom of the pot. Scrape the sides as well. Watch as you stir. If you see bits of darker flecks popping up it means you're stove is set too hot or you're not stirring every inch of the pot. Move it off the direct heat, turn it down and keep stirring for a few minutes, then return to heat. If all goes well you won't see a speck of scorching.
The caramel will bubble and grow darker. You want it to be as dark as the perfect caramel color. Once it does turn darker, keep going a bit longer. If you have a candy thermometer then boil until it reaches 230 to 233 degrees. You can also test it in the cool water. Just drizzle a small amount in the water, stir with finger and form into a ball. If it forms into a nice soft ball that feels like how you'd like it, then it's done. If it's too soft, keep cooking and test again. Once you decide it's done, then pour into prepared 9x13 pan and let cool for 3 hours.
After drooling over the Heaven in a pan for those excruciating hours, you can begin to cut and wrap. I use wax paper cut to about four inches by three inches. Pull the wax paper out to the four inches then cut the strip into thirds. Cut caramels five across and about 1/2 inch wide. When you cut them that size it makes close to 100 pieces of caramels.

Tips:
*The best time to make this is while the kids are gone to school or in bed.
*Be sure to take care of bathroom breaks and other important things that might take you away from stirring. You can't leave or stop stirring the entire time or it will burn.
*Do not stir caramel AFTER taking it off the stove. If you stir after pouring it into a pan or bowl it will crystallize over a day or so.

Once you've mastered the caramel making and you'd like to move on to bigger and better things, try making caramel apples. Instead of pouring the caramel into a 9x13, pour it into a sprayed deep bowl. Let cool for 3 to 5 minutes (if you wait too long it will cool off too soon and the last few of your apples will be lumpy). Be sure to prepare your apples before you start cooking your caramels.
Dip each apple in caramel to cover to your likeness. Place on sprayed wax paper and let cool for an hour. If you have a hankering to get a little fancy with your apples, then dip cooled apples into melted chocolate then into M&M's, chopped nuts, or chopped candy bars. Most everyone's favorite is white chocolate with Graham Crackers. Mix a sprinkle of cinnamon with the crushed crackers to give it a apple pie taste.

With this recipe I make turtles and caramel filled chocolates. To make the turtles simply arrange groups of three pecan halves on sprayed wax paper. Make caramel then cool for five minutes. Spoon caramel over groups of pecans, just enough to mostly cover the pecans. Once cooled completely then spoon melted chocolate over top. They should be about 1 1/2 inches round and delicious.
To make caramel filled chocolates, make caramels, pour into 9x13 pan and cool for those unwanted three long hours. Cut into small pieces and push into chocolate shell. Then cover in chocolate. If you don't know what the heck I'm talking about, then stay tuned. I'll be posting on how to make chocolates.
Well, you can now close your mouth and wipe your chin. We're done.
I hope you've enjoyed your stop at my blog. Come by soon and check out what other recipes I may post. Ta ta!

Pin It

Friday, November 1, 2013

Current News On Writting

Yeah I have a tab on my blog titled Books, and yes I haven't any books published that I can actually give any information about. Boy I wish I did have something to post.
I've been working on it though. I have a book called A Time For Shariton Park (we'll see if the title gets changed) that I've focused most my time on. I have fellow writers and editors helping me out with polishing it up 'til it shines and I hope to have it emailed to the publishers soon.
While I'm waiting for them to email me back with all my many corrections, I have been editing and revising the second book called A Season For Shariton Park (Might change the title).
Both are time travel to and from present day to the early 1800's England. As I'm editing, I've become even more excited about the second one. Don't get me wrong, the first one's spectacular, but the second one hits closer to home than the first.

For those who know me, they will tell you how jumpy I am with my work. I have so many ideas that I can't keep to just one. I've several other books that I work on when the characters won't leave me alone and several other ideas that constantly pester me while I'm trying to sleep. I wish I could work on them all, but I made a promise to myself that I have to at least get one ready to send in before I move ahead to the others.

Currently I have nine books written (several still need revising) and eight more ideas. If only there was more time in a day. Or if I were a vampire and didn't need to sleep then I could have it all written and ready to go in a month. :) Alas, it is not possible, so I hope you will all have patients with me. It will happen some day.

Until then, enjoy my art and my recipes. Stop by again. Pin It
 
Pin It button on image hover